Tuesday, May 31, 2011

Whimsy Stamps Blog Hop

Happy Wednesday! I'm excited to announce that I have joined an amazing new digital design team! I have been using their amazing digital images for awhile now and I'm so excited to be a part of such a talented group of ladies! To start off the new adventure I'm participating in their June Blog Hop! We have created some great projects from the new June images! Be sure to check them out and leave comments as there will be 3 lucky winners of free digital stamps!!

To start at the beginning visit the Whimsy Stamps Inspirations Blog!

Here are a few projects I have created with the New June Release Images =)


Images will be available for purchase today at Whimsy Stamps!


Blog Hop will be going on until Wednesday June 8th at 12:00 noon EST.

Thanks for taking a peak at my new projects and enjoy the Hop!!

Next Stop is: Anneke!!

Sunday, May 29, 2011

Sunshine and Stars

Today sure felt like summer here in the Midwest. We have made it through a very tough few weeks full of storms and tornadoes and I loved seeing the sunshine =) Here are a few summer themed items I listed in my etsy store today...


And now on to some Holiday themed embellishments... My sons favorite Holiday is the 4th of July! I had a few request for the red, white and blue so here are just a few new items =)


Thanks so much for taking a peek at my new creations! Check back on Wednesday as I will be taking part in an awesome blog hop featuring Whimsy Stamps!

-Kindra

Tuesday, May 10, 2011

Flower Giveaway

Thank you so much for everyone who checked out my flower tutorial for the blog hop! I enjoyed reading everyone's super kind comments as well! Congratulations to Mary Johnson who was chosen at random as the winner of a set of flowers handmade by me!

Thanks again and stay tuned for some new and exciting projects!

-Kindra

Friday, May 6, 2011

Beautiful Blooms and Tutorials

First off... for those of you that visited my blog earlier today I'm VERY sorry about the late entry. had an emergency this morning do deal with. But I appreciate your patience and understanding!

This is my very first blog hop to be participating in and also my very first flower demo so thank you in advance for sharing in the experience with me!


Start Here -- Monica Edwards - http://scraps2treasure.blogspot.com/

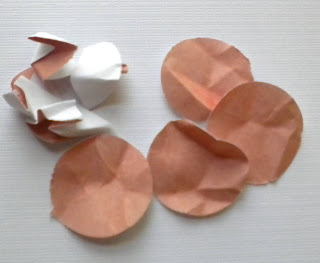
Here are the flowers I will demo today:


Materials Needed
- 1'' circle punch
- hole punch
-mini brad
-water bottle (optional)

Start by punching out 8 circles using your circle punch. I used a 1'' punch for these flowers but any size circle punch will do.

After punching out your circles, crinkle them up in to little balls. A water bottle might be necessary if using thicker type cardstock. If necessary just moisten the paper up before wadding them into balls. After this step gently unfold all of your circles.


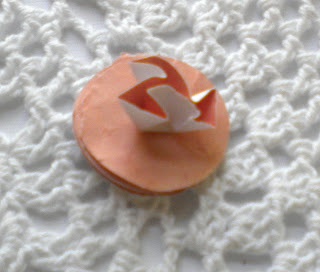
After you unfold all of your circles, punch a hold in the centers. You can do this using a hole punch, an eyelet setter or simply using an exact-o knife. After you punch the holes, layer the circles and bind them together using a mini brad. (sold at local craft or scrapbooking
stores)


After attaching all the circles together, start by wadding up the center circle. Continues bunching up the 7 remaining circles.


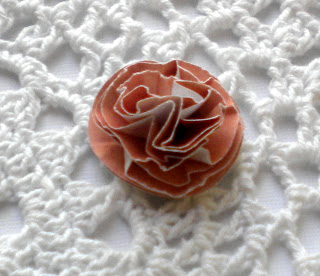
After all 8 circles have been bunched up together, gently pull the petals apart for a "puff" flower look!


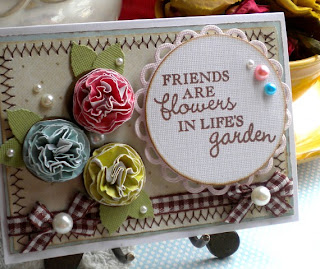
Now add a few leaves and you're ready to go! Here is a card I made using 3 of my puff flowers:


Thanks again for taking a look at my tutorial! If you have any questions I would be more than happy to answer them! Also... If you are interested in winning FREE set of my flowers just leave a comment! I will choose a lucky winner and announce the lucky winner on Monday!